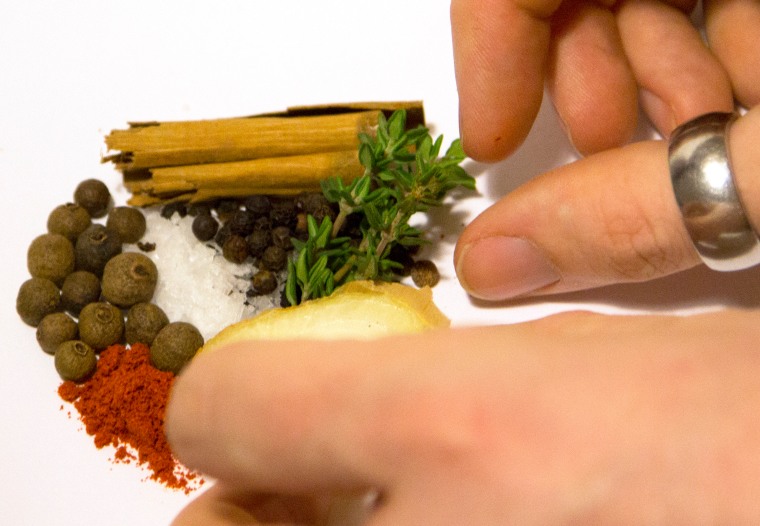
This was a day we’d been looking forward to (and slightly nervous about)! We bought all our spices last week and picked up the fresh herbs on the morning of the shoot. We began at 9am as we had 16 blends to shoot, in addition to 40+ individual spices. That’s a lot of photographs!
While we have some experience, we are by no means at a professional standard of studio photography, so we got some advice and a crash-course in studio lighting and macro photography on the morning from Richard. He helped us figure out an appropriate lighting setup and then we were pretty much on our own. We took all the shots and arranged them ourselves, but he was floating about in case we had any major issues.
I’ll give you a brief run through on our setup and workflow. The shoot took place on my kitchen table (exotic), as we couldn’t get access to a studio, but the kitchen table worked just as well! A large sheet of white card was used as a backdrop.

Kitchen Studio! The laptop on the worktop at the back is tethered to the camera. Soft box is on the left with backlight on the right. The laptop on the table has the shot list and is surrounded by spices galore.
We used a Canon EOS 5D Mark III with a 100mm f/2.8 macro lens. We chose a macro lens because our subjects were so small, we wanted to be able to capture every detail accurately. We shot raw files tethered via USB to a Macbook Pro running Adobe Lightroom. This meant the images were being displayed on the laptop screen as they were taken. This allowed us to review them at a large size. Shooting macro results in a very small depth of field, so we had to ensure that the focal point was in the optimum position on the subject to ensure the majority of the image was somewhat sharp. So being able to check this on a large screen was a big help. An added bonus of tethered shooting was that we had an auto-backup, as the images were being saved both on the card in the camera and also on an external drive connected to the laptop. Plus, when shooting macro sometimes even the motion of pressing the shutter release on the camera can cause camera shake, so this gave us the ability to shoot by pressing a shutter release button in Lightroom, rather than touching the camera.
We had a two light setup to shoot the spices, using two hotshoe flashes. The main light, called the key light, was in a softbox (left of image above), which diffuses the light from the flash, creating the appearance of a more natural light. The second light (right) is the backlight and it lit up the far side of the spices. The flashes were triggered wirelessly by the camera. We used this setup when shooting the blends. When shooting individual spices, we changed it slightly. We need to cut out the images of the individual spices when placing into the app, so we needed as little shadow and colour as possible in the image. Conveniently, my wooden kitchen table has weird rectangular glass panels in it – perfect for us. We moved the second light under the table so it lit the spices from below, through the glass which was beneath the spices, resulting in a much whiter background and minimal shadows.
Between the two of us we alternated arranging the ingredients for the spice blends into circular shapes (surprisingly challenging, intricate, frustrating and absorbing, at all once) and also framing the shot, choosing the focal point, taking and reviewing the photos and marking each shot off on our shot list when it was done, to ensure we didn’t miss any. It also meant that we can look through the final photos and identify pictures by their position relative to the shotlist, should there be any confusion.

Makeshift spice-arranging tools. The glass was handy for making sure the blends were in a circular shape.
This was our first time using Lightroom, and it was so much easier and quicker to fix all the levels and do minor retouching within that rather than in Photoshop. Once the white balance was set on a photograph in Lightroom, it could be applied across the whole batch, handy! All the raw files were exported from this as tiffs for further editing in Photoshop.
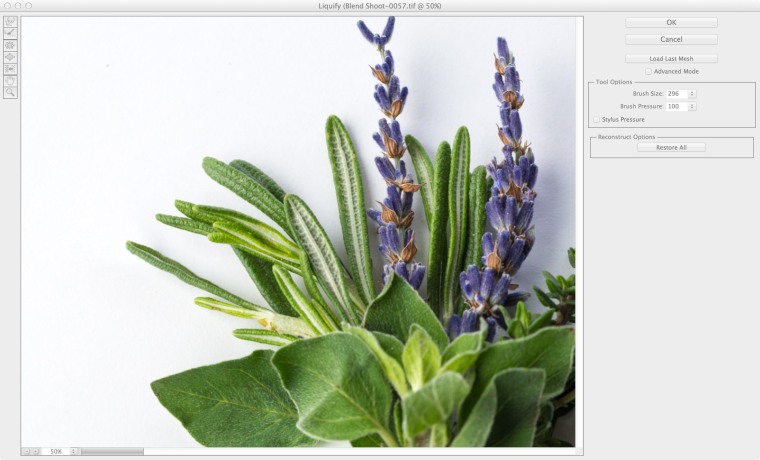
Then it was on to Photoshop. The spices for the blends are arranged in a circular shape, to fit in the design of the app. But occasionally an element, such as a leaf perhaps, was too big for the circular shape, so the liquify tool was used to rework these to fit better in the circle shape. Some blends needed to be reshaped a little. Some wayward grains of spice were cleaned up where they had escaped the circle. Then the photographs were cropped and resized, ready to place into the app. Done!
The remainder of the individual spices will be used in a separate section of the app, so we’ll cut those out and finish any further touch ups required as they are needed.
We were pretty happy with how the photographs turned out and they definitely tie the app together a lot more, as previously there were just random images being used as placeholders.
I think a cheesey team photo would make an apt conclusion to this post:


